
- Description
- Requirements
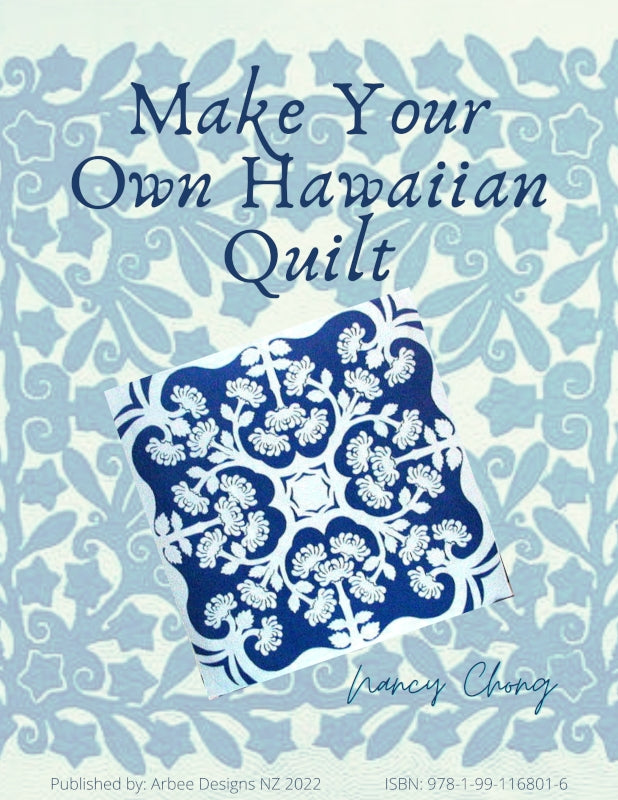
Even though Hawaiian quilts look difficult, they are surprisingly easy! In this ebook, Nancy will show you the easy step-by-step techniques to hand sew a Hawaiian quilt, as well as how to design your very own. You choose the size quilt you want to make, from single block to king, or any size in between. Then follow the instructions to design and make your own unique Hawaiian quilt.
The techniques are written for the beginner, but even experienced quilters will learn new and exciting procedures. If you previously purchased Nancy's Hawaiian Quilting 101 ebook, this will expand your abilities so you can design any size quilt you want. Suitable for all levels.
Originally presented as an online workshop, this class is now available as a printable ebook.
Outline
Part One
- Fabric Choices
- Fabric Amounts to Purchase
- Fabric Preparation
- How to Design Your Own Unique Pattern
Part Two
- Positioning Pattern on Fabric
- Cutting Fabric
- Laying Appliqué Design on Background Fabric
- Opening Up Appliqué Fabric
- Pinning and Basting Appliqué Fabric to Background
- Adding Appliqué Border to Background Fabric
Part Three
- Needleturn Hand Appliqué Techniques
- Hand Quilting Techniques
Part Four
- Joining Quilt Blocks in Poho Poho Style
- Batting Choices
- Basting Top, Batting, and Backing
- Drawing Echo Quilting Lines
- Thread Choices for Quilting
Part Five
- Squaring Off Your Completed Quilt
- Binding Your Quilt
- Displaying Wall Quilt
Supplies
Pattern
I will be teaching you how to make your own pattern in Part One, and that will require
- pencils; pencil sharpener; eraser
- cardboard, poster board, or something that can be used to make a template (This doesn't have to be expensive or plastic, just something stiff enough that you can draw around it several times. Construction paper would be good enough.)
- ruler or yardstick
- pictures of your favorite flowers, trees, fruits, plants or other subject matter you have in mind for your quilt.
You will also need paper on which to draw your final design. In Part One you will learn how big your piece of paper needs to be. For now, however, you may want to buy some craft paper, or start saving wrapping paper, newspapers or brown paper bags (particularly if you are interested in making a large bed-sized quilt).
For those of you who are not interested in making your own design, I will be providing a breadfruit wall quilt pattern. You will print off the Breadfruit/Ulu Pattern twice. You will cut one up and use the other one as a master pattern
Fabric
The amount of fabric you buy will be determined by the size quilt you want. For each size listed below, you will be buying three fabrics, one will be your appliqué, one will be the background and, eventually, you will need a fabric for the backing of your quilt. See Comments About Fabric Choices below.
Here are some basic sizes:
- Wall Quilt: 42" x 42" or a square that is as wide as your fabric. Note that some fabric bolt-ends are marked 44-45" but the fabric actually only measures 42".
- Double/Full Bed Quilt: 6 yards of each fabric
- King/Queen Bed Quilt: 9 yards of each fabric
Buy extra fabric for the binding. If you are making
- a wall quilt, buy 1/2 yard;
- a double/full bed quilt, buy 3/4 yard; and
- a queen/king bed quilt, buy 1-1/2 yards for the binding
Your binding can be made from either the appliqué fabric or the background fabric. Generally, if your design has a border, the appliqué fabric is also used for the binding. If your design does not have a border, then you can have a contrasting binding by using the appliqué fabric or you can have a binding that matches the background. These are your creative choices, and there is no wrong decision.
Other Supplies
- batting
- iron and ironing board
- paper scissors
- fabric scissors good enough to cut through eight layers of fabric.
- straight pins. At least 150 long ones that can pin through eight layers of fabric easily. I prefer silk pins because they are long and sharp, you can use whatever you find works for you. For a large bed quilt, you may need more than 150.
- thread to match your appliqué. You may need two spools for a large quilt.
- ugly colored thread that looks awful with your fabric choices. I like to use up those odd spools that have very little thread left on them. Do not, however, use thread on a wooden spool or Talon thread (unless it says "mercerized").
- masking tape. Any kind or size will work. This is just to secure the fabric to your table top during the basting process.
- basting needle. Any long needle will work.
- needles for appliqué. I prefer long thin ones, but you can use any needle you like.
- needles for hand quilting. I prefer hand quilting/between No. 10.
- marking tool. We will need two marking tools for this entire project.
- The first one is any marking tool that will show up on your appliqué fabric. I prefer a chalk pencil of a contrasting color, but you can use a lead pencil or Pigma Pen™ if you have one. You will be marking on the cutting line, so do not worry about this mark showing on your finished project. Do NOT use a ballpoint ink pen. That ink runs when it gets wet, and we do not want that to show later on when the quilt gets washed.
- When it is time to begin marking the quilting lines in Part Four, you will need a marking tool that is not permanent. I prefer to use Clover Water Soluble Pencils, but any marking tool that you are confident is temporary will work just fine. You will need one that shows on your applique fabric, and one that shows on your background fabric.
- quilt hoop:14”, 16”, 18” or larger
- hand quilting thread (at least four spools for king/queen bed)
- ruler for marking 1/2" or 5/8" quilting lines. I prefer the Dritz Ruler With Sliding Guide, but you can use anything that is easy to read.
- yardstick or tape measure
- rotary cutter or sharp scissors
- sewing machine
Comments About Supplies
Fabrics
Hawaiian Quilts are very striking because of their sophistication, symmetry, and contrast. Your choice of two contrasting fabrics for your quilt top is the most important decision you will make for the success of your project.
Traditionally, Hawaiian quilts were made using two contrasting solid-colored fabrics. The advantage to using solid fabric is that the echo quilting rows showed off very well, adding the distinctive personality to the quilt. However, now that the beautiful batiks, textures and hand-dyed fabrics are available, many Hawaiian quilters are switching to those fabric choices. Just be sure you maintain a high contrast between the background fabric and the appliqué fabric. This is not a place for blending!
Remember, if you choose a fabric for either the background or the appliqué that has a highly contrasting print, such as a floral, or geometric design, you will not be able to clearly see the applique shapes nor see the quilting lines very well in that portion of the quilt, and some of the drama will be lost. That does not mean you cannot buy your favorite fabric and use it in a Hawaiian quilt. It just means busy fabric may not show off your applique and quilting efforts as well as a more solid-looking fabric.
If the appliqué fabric and background fabric are too close in value, you may lose some of the dramatic effects of a Hawaiian quilt, but you will have done all the same work. In the example below, you can easily see the outline of the design and the quilting lines.
Below is an example of a quilt made by Jacky Thomas, of Morgan City, Louisana. Jacky intended for her Hawaiian quilt, Polynesia, to have some low contrasting fabrics. In her words: "There are great subtleties in a forest as well as bright contrasts. In my quilt I sought to convey this subtlety in some of the blocks (e.g., looking through dark foliage to a misty area or into water)."
Backing Fabric
For the back of their quilts, the Hawaiians like to use print fabrics that are color-coordinated with the two fabrics that appear on the front of the quilt. You will not need your backing fabric until the appliqué is finished, but you might keep your eyes open for the perfect fabric now. Make sure you buy enough so it is a few inches larger than the quilt top. Be sure to wash your backing fabric and make sure that the dye will not run.
Needles
I prefer using a long, thin appliqué needle. My favorite is a Milliner’s/Straw Needle, Size 10 or 11. I have found that thin needles are easier to use because they pierce the fibers with less effort and with less strain on my hand, wrist, elbow and shoulder. In choosing a needle you need to be aware that the higher the needle size, the shorter and thinner that needle is. I do not recommend using any needle with a size less than 10. So, if you like short needles, try Hand Quilting/Betweens Size 12, 11 or 10. If those are too short, try Sharps/Hand Appliqué Size 12, 11 or 10. If those are too short, try Milliners/Straw Size 11 or 10. I prefer a long needle because it is easier for me to manipulate the seam allowance when I tuck it under. You may, however, use your favorite needle. The most important thing about the choice of needle is that it feels comfortable to you. (Milliner's/Straw needles were invented for making straw hats, and those two names are used interchangeably here in the U.S. If you see a package here that says "Milliners" or a package that says "Straw" those are the right needles, just be sure to get sizes 10 or 11. Do not get the 'assorted' packages as they do not have either size enclosed.
Thread
The most important decision you will make in appliqué is which needle to use. The second most important decision is the thread that best matches your appliqué fabric. I always take my appliqué fabric with me when choosing thread. I lay one strand of the thread against my fabric to make the best decision. Do not lay the entire spool of thread next to the fabric; you are only seeing the thread lay against itself. If you find a perfect match, great. Often, you are not that lucky.
If you find two spools that are close, but not perfect, here is a helpful hint about which spool to select. Take into consideration the color of your background fabric. If you have a darker background than your appliqué fabric, choose the thread that is slightly darker. If your background fabric is lighter than the appliqué fabric, select the thread that is slightly lighter.
I prefer to use 100% cotton thread, not because I am a purist about fiber content, but because it is easier to thread the thin needles I use. If I find the perfect thread color in a poly-cotton thread, I will use it, but I will change my needle to a size 10 Milliners/Straw needle so the eye is a little larger. My favorite thread is Aurifil (50/2) cotton thread. All-purpose sewing thread (50/3) works well, too, but is a little thicker than the 50/2 or 60/2 thread. As with needles, the higher the size of the thread, the thinner that thread is.
Batting
Batting is an important issue with Hawaiian quilts and I want you to be happy with your results. I love to use 100% polyester bonded batting for their quilts (and so do the Hawaiian quilters I know). This type of high-loft batting retains its loft between the many rows of quilting. The light and shadows cast on those rows create the personality of the quilt and really brings the quilt to life. If you choose a thin or flat batting, you will do the same amount of stitching, but there will be less personality to the finished quilt. It is not as hard to quilt through as you have been told.
Choose a batting that has a high loft, between 4.5 oz and 6.0 oz in weight and between 45"- 60" inches wide. The batting I prefer usually comes on a large roll (and around here, can be found in the back of the national fabric chain stores). If you only have battings available that come in a bag, I have found that Hobbs High Loft Cloud-Loft© batting is a suitable weight for your Hawaiian quilt. If you do not have that available, use any brand of 100% polyester medium-to-high loft batting. In the Hawaiian tradition, any loft is better than using a flat cotton batting.
The high loft batting that you are probably familiar with is believed to be impossible to quilt by hand, but it is not. I have been quilting with it for over 34 years, never had a bearding problem, it quilts and drapes wonderfully when it is completed. It appears impossible to quilt by hand at the very beginning because it still has all the air between the polyester fibers. Once you begin to quilt (in the center of the quilt), you begin to squish the air out (just like rolling up a sleeping bag). Each successive row of quilting squishes out more air, and the fibers are condensed and it gets easier and easier to quilt.
There are some polyester battings that have a very stiff bonding agent and I avoid those. When I shop, I check the end of the roll of batting (I usually find the rolls in the back of chain fabric stores, like JoAnn's and Hancock Fabrics in my area). Their labels indicate a weight. The weight is how much one yard of that size batting weighs. For example, if you have a roll of batting that is 54" tall, one yard of that batting will weigh X ounces. That is the weight. So if it is 54" tall and weighs 4.5 ounces, then it is an appropriate weight for a Hawaiian quilt.
I have avoided bagged battings for years because in general they are not very consistent in their thickness. Some spots have double batting, while right next to that spot there is hardly any batting. Hobbs seems to do the best job lately in making even batting. Any high loft batting by any manufacturer is better than a low-loft poly or cotton batting and if you cannot find any high loft polyester batting, then you might try layering two low loft polyester battings together.
Wool batting might be an option for you, too. I recently completed a quilt using wool batting and was pleasantly surprised at how wonderful it worked. There is still loft between the rows of quilting, it is soft and lightweight, and it was incredibly easy to needle. The stitches were made with such ease it was like there was no batting at all. Wool batting is expensive, so be prepared. In my area a polyester queen-size batting costs $12, and the wool batting costs $40, but the results just might be worth the extra expense for you. Hobbs is the brand I used, and I have heard about one called Matilda's Own that is a blend of polyester and wool. I have not tried it yet, but think that might work well also.
Quilting Thread
I prefer to use hand quilting thread because of its strength. I have used 100% cotton thread, and cotton-wrapped polyester thread, and I like both. Just be sure to use the same type of thread throughout the quilt.
You have color choices to make when choosing your thread. For this discussion, let us assume we are using red appliqué on a yellow background.
(1) White thread is the traditional color for hand quilting, regardless of the color of the fabrics used. I think that is due, in part, to the fact that it was the only color available for a long time. You could choose white thread for the entire surface of your quilt.
(2) Red thread over the entire surface of your quilt. The quilting stitches will not show as much on the appliqué fabric, but will be featured on the yellow background. In the project I am working on here, I chose to use blue quilting thread (the same color as the appliqué fabric) over the entire surface of the quilt. Notice in the pictures below how the quilting shows more in the background.
(3) Yellow thread over the entire surface of your quilt. The quilting stitches will show more in the appliqué fabric than they will on the background.
(4) Choose yellow thread for the background quilting, and red thread for the quilting in the appliqué fabric. Your stitches will not show very much at all, but the light and shadows will still draw attention to the loft between the rows.
(5) Choose opposite colors: red thread on yellow fabric, and yellow thread on red fabric. All of your stitches will show and add another dimension of creativity to your quilt.
(6) Third Color. You will not see this choice often, but it can be striking. Let’s assume you love red, white, and blue. If you have made a red and white quilt, you could choose to quilt it with blue thread. It will look different from everyone else’s quilt, and you have made a creative choice that pleases you.
This block project will not use much thread. One spool will be plenty. If you were making a queen or king-size quilt, however, you would use up to five spools of thread.
If you have difficulty finding fabrics or other quilting supplies, please check my website at www.prqc.com.
Supplies
Pattern
I will be teaching you how to make your own pattern in Part One, and that will require
- pencils; pencil sharpener; eraser
- cardboard, poster board, or something that can be used to make a template (This doesn't have to be expensive or plastic, just something stiff enough that you can draw around it several times. Construction paper would be good enough.)
- ruler or yardstick
- pictures of your favorite flowers, trees, fruits, plants or other subject matter you have in mind for your quilt.
You will also need paper on which to draw your final design. In Part One you will learn how big your piece of paper needs to be. For now, however, you may want to buy some craft paper, or start saving wrapping paper, newspapers or brown paper bags (particularly if you are interested in making a large bed-sized quilt).
For those of you who are not interested in making your own design, I will be providing a breadfruit wall quilt pattern. You will print off the Breadfruit/Ulu Pattern twice. You will cut one up and use the other one as a master pattern.

Fabric
The amount of fabric you buy will be determined by the size quilt you want. For each size listed below, you will be buying three fabrics, one will be your appliqué, one will be the background and, eventually, you will need a fabric for the backing of your quilt. See Comments About Fabric Choices below.
Here are some basic sizes:
- Wall Quilt: 42" x 42" or a square that is as wide as your fabric. Note that some fabric bolt-ends are marked 44-45" but the fabric actually only measures 42".
- Double/Full Bed Quilt: 6 yards of each fabric
- King/Queen Bed Quilt: 9 yards of each fabric
Buy extra fabric for the binding. If you are making
- a wall quilt, buy 1/2 yard;
- a double/full bed quilt, buy 3/4 yard; and
- a queen/king bed quilt, buy 1-1/2 yards for the binding
Your binding can be made from either the appliqué fabric or the background fabric. Generally, if your design has a border, the appliqué fabric is also used for the binding. If your design does not have a border, then you can have a contrasting binding by using the appliqué fabric or you can have a binding that matches the background. These are your creative choices, and there is no wrong decision.
Other Supplies
- batting
- iron and ironing board
- paper scissors
- fabric scissors good enough to cut through eight layers of fabric.
- straight pins. At least 150 long ones that can pin through eight layers of fabric easily. I prefer silk pins because they are long and sharp, you can use whatever you find works for you. For a large bed quilt, you may need more than 150.
- thread to match your appliqué. You may need two spools for a large quilt.
- ugly colored thread that looks awful with your fabric choices. I like to use up those odd spools that have very little thread left on them. Do not, however, use thread on a wooden spool or Talon thread (unless it says "mercerized").
- masking tape. Any kind or size will work. This is just to secure the fabric to your table top during the basting process.
- basting needle. Any long needle will work.
- needles for appliqué. I prefer long thin ones, but you can use any needle you like.
- needles for hand quilting. I prefer hand quilting/between No. 10.
- marking tool. We will need two marking tools for this entire project.
- The first one is any marking tool that will show up on your appliqué fabric. I prefer a chalk pencil of a contrasting color, but you can use a lead pencil or Pigma Pen™ if you have one. You will be marking on the cutting line, so do not worry about this mark showing on your finished project. Do NOT use a ballpoint ink pen. That ink runs when it gets wet, and we do not want that to show later on when the quilt gets washed.
- When it is time to begin marking the quilting lines in Part Four, you will need a marking tool that is not permanent. I prefer to use Clover Water Soluble Pencils, but any marking tool that you are confident is temporary will work just fine. You will need one that shows on your applique fabric, and one that shows on your background fabric.
- quilt hoop:14”, 16”, 18” or larger
- hand quilting thread (at least four spools for king/queen bed)
- ruler for marking 1/2" or 5/8" quilting lines. I prefer the Dritz Ruler With Sliding Guide, but you can use anything that is easy to read.
- yardstick or tape measure
- rotary cutter or sharp scissors
- sewing machine
Comments About Supplies
Fabrics
Hawaiian Quilts are very striking because of their sophistication, symmetry, and contrast. Your choice of two contrasting fabrics for your quilt top is the most important decision you will make for the success of your project.
Traditionally, Hawaiian quilts were made using two contrasting solid-colored fabrics. The advantage to using solid fabric is that the echo quilting rows showed off very well, adding the distinctive personality to the quilt. However, now that the beautiful batiks, textures and hand-dyed fabrics are available, many Hawaiian quilters are switching to those fabric choices. Just be sure you maintain a high contrast between the background fabric and the appliqué fabric. This is not a place for blending!
Remember, if you choose a fabric for either the background or the appliqué that has a highly contrasting print, such as a floral, or geometric design, you will not be able to clearly see the applique shapes nor see the quilting lines very well in that portion of the quilt, and some of the drama will be lost. That does not mean you cannot buy your favorite fabric and use it in a Hawaiian quilt. It just means busy fabric may not show off your applique and quilting efforts as well as a more solid-looking fabric.
If the appliqué fabric and background fabric are too close in value, you may lose some of the dramatic effects of a Hawaiian quilt, but you will have done all the same work. In the example below, you can easily see the outline of the design and the quilting lines.

Below is an example of a quilt made by Jacky Thomas, of Morgan City, Louisana. Jacky intended for her Hawaiian quilt, Polynesia, to have some low contrasting fabrics. In her words: "There are great subtleties in a forest as well as bright contrasts. In my quilt I sought to convey this subtlety in some of the blocks (e.g., looking through dark foliage to a misty area or into water)."

Backing Fabric
For the back of their quilts, the Hawaiians like to use print fabrics that are color-coordinated with the two fabrics that appear on the front of the quilt. You will not need your backing fabric until the appliqué is finished, but you might keep your eyes open for the perfect fabric now. Make sure you buy enough so it is a few inches larger than the quilt top. Be sure to wash your backing fabric and make sure that the dye will not run.
Needles
I prefer using a long, thin appliqué needle. My favorite is a Milliner’s/Straw Needle, Size 10 or 11. I have found that thin needles are easier to use because they pierce the fibers with less effort and with less strain on my hand, wrist, elbow and shoulder. In choosing a needle you need to be aware that the higher the needle size, the shorter and thinner that needle is. I do not recommend using any needle with a size less than 10. So, if you like short needles, try Hand Quilting/Betweens Size 12, 11 or 10. If those are too short, try Sharps/Hand Appliqué Size 12, 11 or 10. If those are too short, try Milliners/Straw Size 11 or 10. I prefer a long needle because it is easier for me to manipulate the seam allowance when I tuck it under. You may, however, use your favorite needle. The most important thing about the choice of needle is that it feels comfortable to you. (Milliner's/Straw needles were invented for making straw hats, and those two names are used interchangeably here in the U.S. If you see a package here that says "Milliners" or a package that says "Straw" those are the right needles, just be sure to get sizes 10 or 11. Do not get the 'assorted' packages as they do not have either size enclosed.
Thread
The most important decision you will make in appliqué is which needle to use. The second most important decision is the thread that best matches your appliqué fabric. I always take my appliqué fabric with me when choosing thread. I lay one strand of the thread against my fabric to make the best decision. Do not lay the entire spool of thread next to the fabric; you are only seeing the thread lay against itself. If you find a perfect match, great. Often, you are not that lucky.
If you find two spools that are close, but not perfect, here is a helpful hint about which spool to select. Take into consideration the color of your background fabric. If you have a darker background than your appliqué fabric, choose the thread that is slightly darker. If your background fabric is lighter than the appliqué fabric, select the thread that is slightly lighter.
I prefer to use 100% cotton thread, not because I am a purist about fiber content, but because it is easier to thread the thin needles I use. If I find the perfect thread color in a poly-cotton thread, I will use it, but I will change my needle to a size 10 Milliners/Straw needle so the eye is a little larger. My favorite thread is Aurifil (50/2) cotton thread. All-purpose sewing thread (50/3) works well, too, but is a little thicker than the 50/2 or 60/2 thread. As with needles, the higher the size of the thread, the thinner that thread is.
Batting
Batting is an important issue with Hawaiian quilts and I want you to be happy with your results. I love to use 100% polyester bonded batting for their quilts (and so do the Hawaiian quilters I know). This type of high-loft batting retains its loft between the many rows of quilting. The light and shadows cast on those rows create the personality of the quilt and really brings the quilt to life. If you choose a thin or flat batting, you will do the same amount of stitching, but there will be less personality to the finished quilt. It is not as hard to quilt through as you have been told.
Choose a batting that has a high loft, between 4.5 oz and 6.0 oz in weight and between 45"- 60" inches wide. The batting I prefer usually comes on a large roll (and around here, can be found in the back of the national fabric chain stores). If you only have battings available that come in a bag, I have found that Hobbs High Loft Cloud-Loft© batting is a suitable weight for your Hawaiian quilt. If you do not have that available, use any brand of 100% polyester medium-to-high loft batting. In the Hawaiian tradition, any loft is better than using a flat cotton batting.
The high loft batting that you are probably familiar with is believed to be impossible to quilt by hand, but it is not. I have been quilting with it for over 34 years, never had a bearding problem, it quilts and drapes wonderfully when it is completed. It appears impossible to quilt by hand at the very beginning because it still has all the air between the polyester fibers. Once you begin to quilt (in the center of the quilt), you begin to squish the air out (just like rolling up a sleeping bag). Each successive row of quilting squishes out more air, and the fibers are condensed and it gets easier and easier to quilt.
There are some polyester battings that have a very stiff bonding agent and I avoid those. When I shop, I check the end of the roll of batting (I usually find the rolls in the back of chain fabric stores, like JoAnn's and Hancock Fabrics in my area). Their labels indicate a weight. The weight is how much one yard of that size batting weighs. For example, if you have a roll of batting that is 54" tall, one yard of that batting will weigh X ounces. That is the weight. So if it is 54" tall and weighs 4.5 ounces, then it is an appropriate weight for a Hawaiian quilt.
I have avoided bagged battings for years because in general they are not very consistent in their thickness. Some spots have double batting, while right next to that spot there is hardly any batting. Hobbs seems to do the best job lately in making even batting. Any high loft batting by any manufacturer is better than a low-loft poly or cotton batting and if you cannot find any high loft polyester batting, then you might try layering two low loft polyester battings together.
Wool batting might be an option for you, too. I recently completed a quilt using wool batting and was pleasantly surprised at how wonderful it worked. There is still loft between the rows of quilting, it is soft and lightweight, and it was incredibly easy to needle. The stitches were made with such ease it was like there was no batting at all. Wool batting is expensive, so be prepared. In my area a polyester queen-size batting costs $12, and the wool batting costs $40, but the results just might be worth the extra expense for you. Hobbs is the brand I used, and I have heard about one called Matilda's Own that is a blend of polyester and wool. I have not tried it yet, but think that might work well also.
Quilting Thread
I prefer to use hand quilting thread because of its strength. I have used 100% cotton thread, and cotton-wrapped polyester thread, and I like both. Just be sure to use the same type of thread throughout the quilt.
You have color choices to make when choosing your thread. For this discussion, let us assume we are using red appliqué on a yellow background.
(1) White thread is the traditional color for hand quilting, regardless of the color of the fabrics used. I think that is due, in part, to the fact that it was the only color available for a long time. You could choose white thread for the entire surface of your quilt.
(2) Red thread over the entire surface of your quilt. The quilting stitches will not show as much on the appliqué fabric, but will be featured on the yellow background. In the project I am working on here, I chose to use blue quilting thread (the same color as the appliqué fabric) over the entire surface of the quilt. Notice in the pictures below how the quilting shows more in the background.
(3) Yellow thread over the entire surface of your quilt. The quilting stitches will show more in the appliqué fabric than they will on the background.
(4) Choose yellow thread for the background quilting, and red thread for the quilting in the appliqué fabric. Your stitches will not show very much at all, but the light and shadows will still draw attention to the loft between the rows.
(5) Choose opposite colors: red thread on yellow fabric, and yellow thread on red fabric. All of your stitches will show and add another dimension of creativity to your quilt.
(6) Third Color. You will not see this choice often, but it can be striking. Let’s assume you love red, white, and blue. If you have made a red and white quilt, you could choose to quilt it with blue thread. It will look different from everyone else’s quilt, and you have made a creative choice that pleases you.
This block project will not use much thread. One spool will be plenty. If you were making a queen or king-size quilt, however, you would use up to five spools of thread.
If you have difficulty finding fabrics or other quilting supplies, please check my website at www.prqc.com.
- Choosing a selection results in a full page refresh.
- Opens in a new window.